How to Fix IP Address Conflict on WiFi Router – Easy Guide
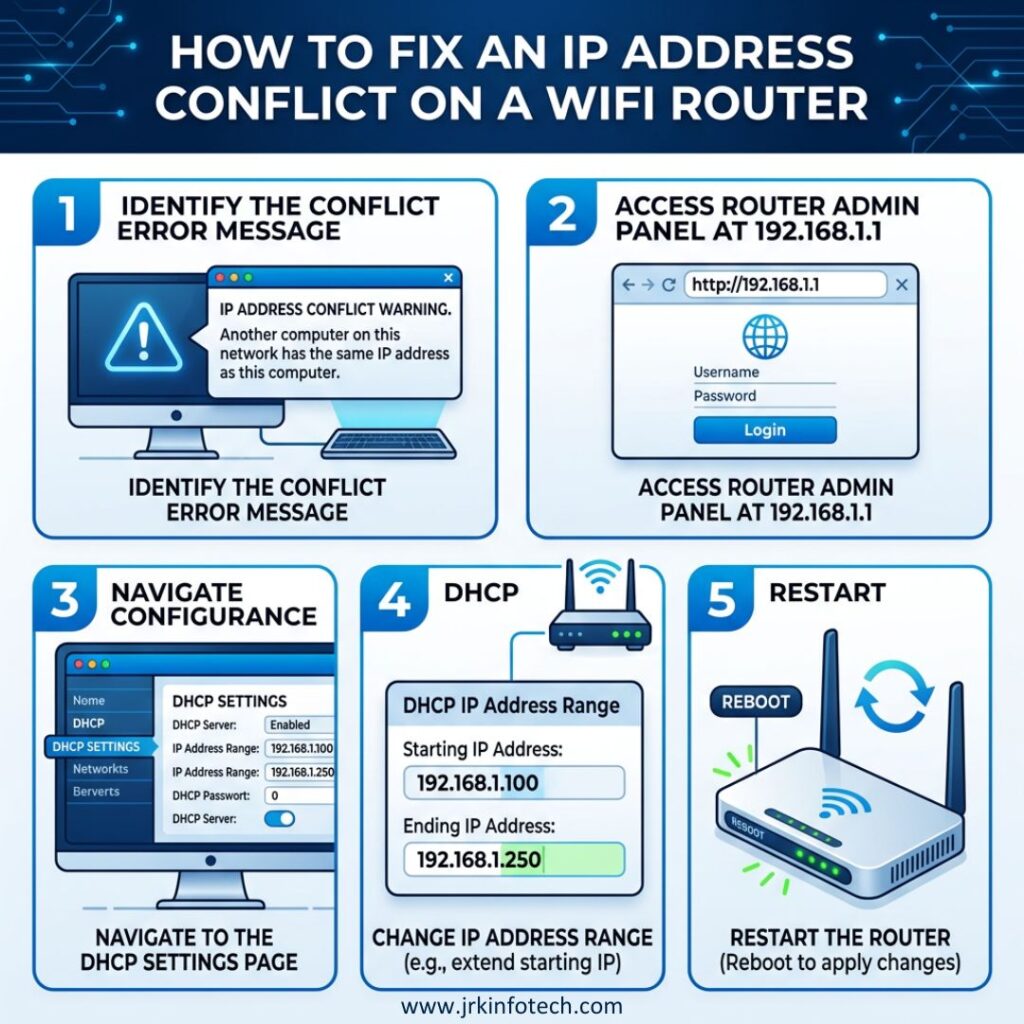
An IP address conflict on WiFi means two or more devices on your home network are trying to use the same internal IP address (for example, both at 192.168.1.100). When this happens, one device may lose internet, show “IP address conflict” or “Windows has detected an IP address conflict,” or keep disconnecting from the router.
Most of these conflicts can be fixed by restarting devices, cleaning up static IP settings, and adjusting your router’s DHCP settings. Below is a clear, step‑by‑step guide you can follow on any home WiFi router.
What causes an IP address conflict?
An IP conflict usually happens when:
- Two devices are set to the same static IP address (for example, both manually changed to
192.168.1.10). - A device has a static IP that lies inside the router’s automatic DHCP range, so the router sometimes assigns that same IP to another device.
- There is a second router or extender on the same network also handing out IP addresses (double DHCP).
Symptoms you may see:
- “This IP address is already in use”
- Internet works on some devices but not on one specific PC or phone
- The device keeps dropping WiFi or shows “No internet”
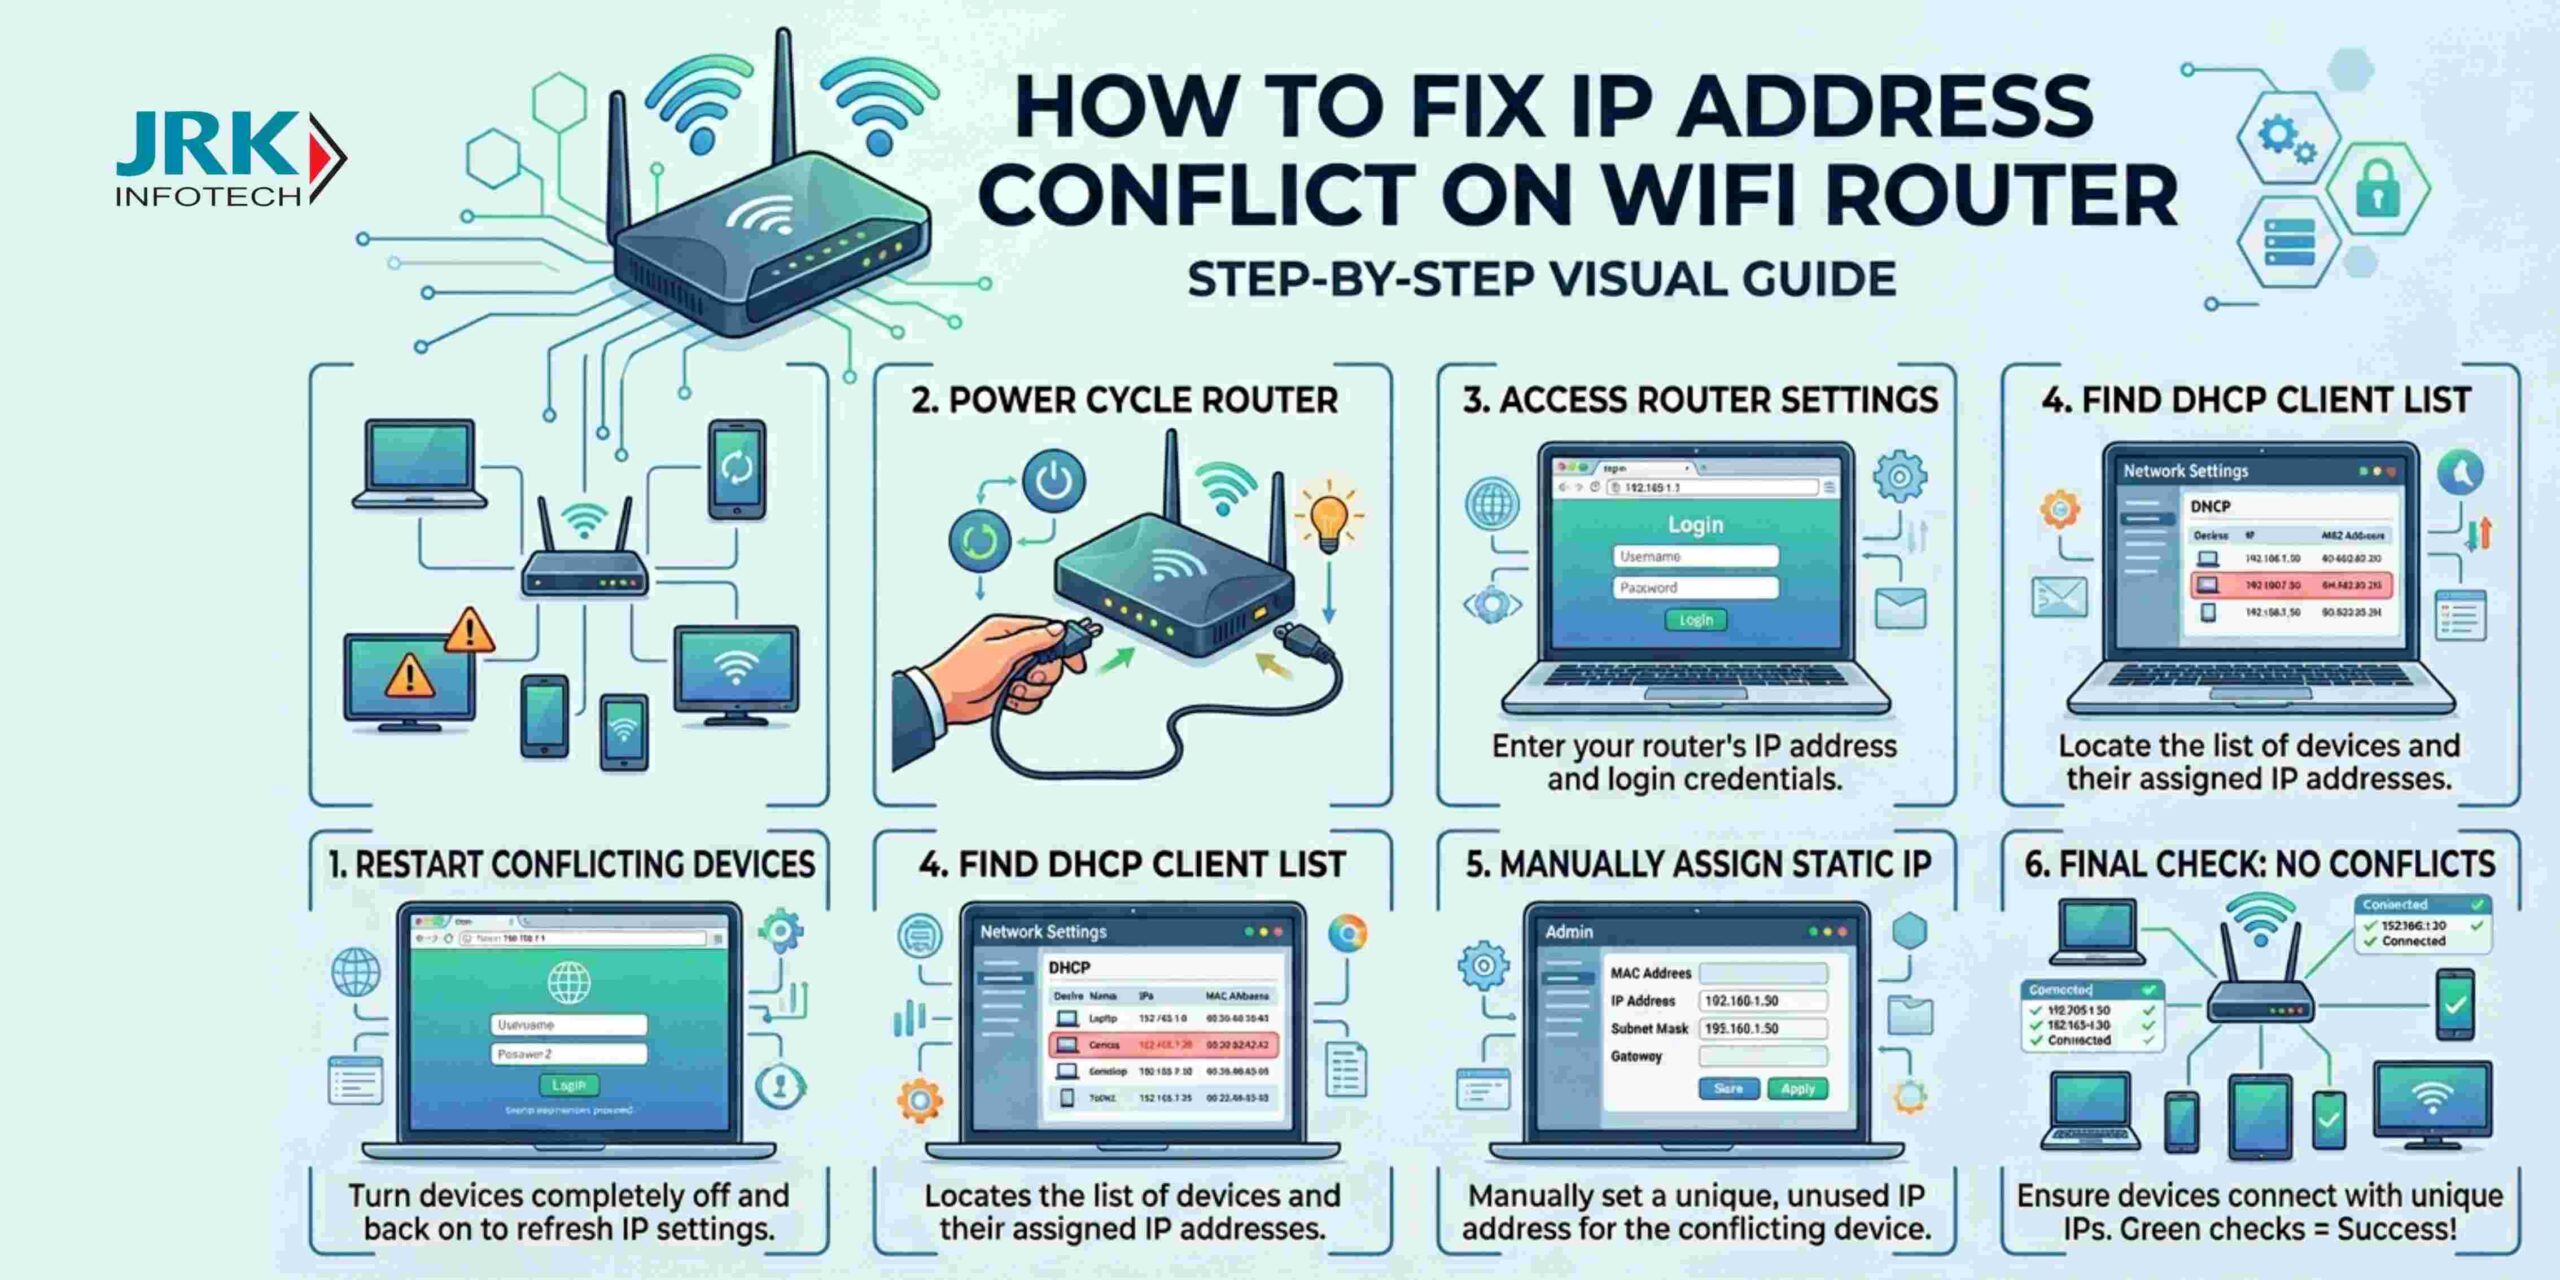
Step 1: Restart the router and devices
A simple restart often clears temporary conflicts.
- Unplug both the modem and router and wait about 30–60 seconds.
- Plug the modem back in and wait until its lights stabilize.
- Plug the router back in and wait for all network lights to come back.
- Restart the device that is showing the IP conflict (laptop, phone, smart TV, etc.).
This forces the router to reallocate IP addresses through DHCP and usually fixes one‑off conflicts without any extra work.
Step 2: Renew IP address on the computer
If the problem is on a Windows or Mac computer, refresh its IP lease.
On Windows
- Press Win + R, type
cmd, then press Enter. - In Command Prompt, run:
ipconfig /releaseipconfig /renew
- Close the window and check if the IP conflict is gone.
On Mac
- Go to System Preferences → Network → Wi‑Fi → Advanced → TCP/IP.
- Click Renew DHCP Lease.
This releases the old IP and asks the router for a fresh one, which often resolves the conflict.
Step 3: Check and remove static IP settings
Manually set static IPs are a common cause of recurring conflicts.
On Windows (WiFi adapter)
- Go to Settings → Network & Internet → Wi‑Fi → Properties for your network.
- Click Edit next to IP assignment.
- Set it to Automatic (DHCP) if it is set to Manual.
- If you must use a static IP, choose an address that is outside the router’s DHCP range (for example,
192.168.1.2–99if the router hands out192.168.1.100–199).
On Android / iPhone
- Android:
- WiFi → tap the network → Advanced → IP settings → change from Static to DHCP.
- iPhone:
- WiFi → tap the i next to the network → Configure IP → set to Automatic instead of Manual.
After this change, reconnect to WiFi and test the internet.
Step 4: Adjust the router’s DHCP range
To avoid conflicts in the future, make sure static IPs and DHCP IPs don’t overlap.
- Open a browser and go to your router’s admin page (usually
192.168.0.1,192.168.1.1, or as printed on the router label). - Log in with your admin username and password.
- Go to LAN / DHCP settings (sometimes under Network or Advanced).
- Note the DHCP range (for example,
192.168.1.100–199). - When assigning static IPs to devices (printer, CCTV, smart TV), use addresses outside this range, like
192.168.1.2–99.
This keeps static and automatic IPs in separate blocks and reduces the chance of clashes.
Step 5: Handle multiple routers or extenders
If you keep seeing conflicts even after the above steps:
- If you have a second router or WiFi extender, set it to AP / Bridge mode and disable its DHCP server.
- On your main router, use DHCP reservation / static lease for important devices (laptop, gaming console, smart TV) instead of configuring static IPs on each device.
This avoids double‑DHCP and keeps IPs consistent across the network.
Step 6: How to prevent IP conflicts in the future
To keep your WiFi running smoothly:
- Avoid manual static IPs unless absolutely necessary; rely on DHCP or DHCP reservations instead.
- Keep your router firmware updated so the DHCP server works reliably.
- If you have many devices, slightly shorten the DHCP lease time (for example, 1–4 hours) so old IPs are reused faster and conflicts are less likely.
Quick troubleshooting checklist
Use this whenever an “IP address conflict on WiFi” appears:
- Restart modem + router + the affected device.
- On a PC, run
ipconfig /releaseandipconfig /renew(or equivalent on Mac). - Check that the device is set to Automatic IP (DHCP), not Static.
- Confirm the router’s DHCP range and ensure static IPs are outside it.
If you tell me your router model (for example, “TP‑Link Archer C80” or “D‑Link DIR‑825”), I can customize this blog with exact menu names and simpler wording tailored to your router.